For students, faculty, and staff using personal devices (Non-Cloud based printers):
- Go to System Settings
- Choose Print & Scanners on the left
- Click on the "Add Printer, Scanner, or Fax" button
- Click on the Globe icon (in the top middle)
- If connecting to most laser printers, make sure the Protocol field says "AirPrint"
- If connecting to a color laser printer, change the Protocol field to "HP Jetdirect - Socket"
- In the Address field, type the Device Name (from the two lists below)
- Black/White printers: stulaserlib, stulaseral116, stulaserad225, stulaserad228, stulasergph, stulaserbartlett, stulaserth, or stulaserhinman
- Color printers: stucolorlib, stucoloral116, or stucolorad228
- Click the Add button
- If you are asked about Duplex Printing, please check the box (to print on both sides of the page)
For faculty and staff using Thomas devices (Installing Cloud Based Printers):
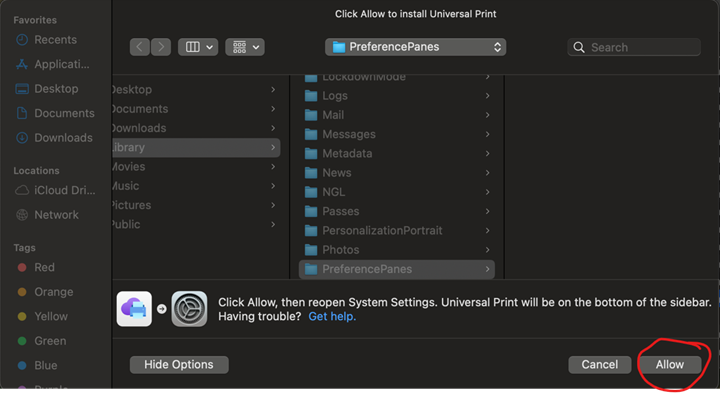
- Go to Applications, click on Universal Print, When the box opens up, click on Allow
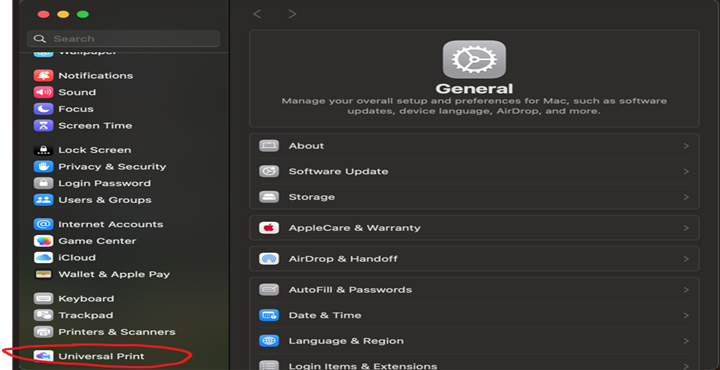
- Once you click Allow, a SETTINGS box will open. In the Left Pane, scroll down to the bottom, and click on 'Universal Print'
- On the Right side of the box that opens, click 'Sign In', then log in with your Thomas credentials, Click OK
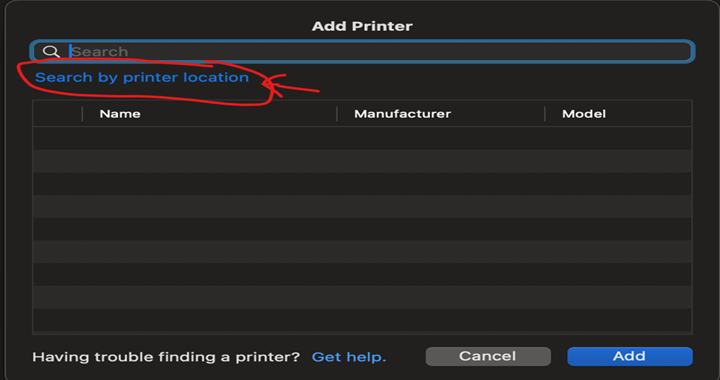
- Next, click on ADD PRINTER, then click on'Search by Printer Location', then click United States
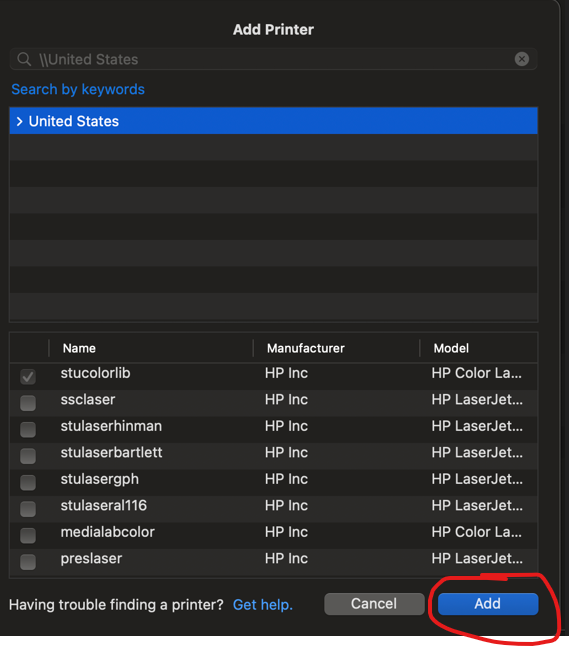
- Select the printer you want to add, then Click ADD
- That's it!
- Go to System Settings
- Choose Print & Scanners on the left
- Click on the "Add Printer, Scanner, or Fax" button
- Control Click in title bar
- Choose Customize Toolbar
- Add the Advanced icon to title bar (drag and drop)
- Choose Done
- Choose Advanced
- Type: Windows Printer via Spoolss
- URL: smb://t7.tcnet.thomas.edu/Device_Name (from the list below)
- Common printers: mainprinter1, mainprinter2, colorlaser2, acadctrprinter2
- Name: (repeat the Device Name above)
- Use: (choose Generic Postscript or the specific driver)
For faculty and staff using Thomas devices (Installing Non-Cloud Based Printers):
NOTE: When printing, use THOMAS\username and your password when prompted to authenticate (you must have THOMAS in capitals). Ensure that the 'Remember this password in my keychain' box is checked.